
Whether you use your chatbot for lead generation, recruitment or marketing purposes, sometimes it can be useful to let your chatbot send an email to the right person when a conversation has reached a certain point.
Your Sales team likely wants to receive an email when your chatbot has qualified a new lead. Maybe your Customer Service team wants to receive customer feedback via email, or perhaps your HR department wants to receive an email with the details of new applicants.
In this Best Practice article, we will show you how your chatbot can automatically look up email addresses in a spreadsheet and send an email to the right person, with all the relevant content included.
What do you need to realise this?
- A Premium, Business or Enterprise plan
- A paid Zapier account
- A Google Sheets spreadsheet with email addresses
- Data from your email provider (or server) for sending the email
Let's get started!
The first step required for this action is to prepare our chatbot conversation. In this article, we will use the example of sending an email to the right person when a new lead has been qualified by the chatbot.
The first thing to do is to create a custom field that is going to be filled in, which will ensure that the email is sent to the correct email address later. Follow the steps below:
- Log on to Watermelon, go to settings and click on ‘Custom fields';
- Create a new custom field. Read here how this works;
- Give this custom field a recognisable name, for example 'Department for lead mail';
- Set the field type to 'Long text', and set the ‘Unique’ dropdown to ‘No’;
- Next, create the second custom field. This custom field serves to indicate that the mail may actually be sent. Give this field a recognisable name as well, for example 'Send mail trigger';
- Also set this field type to ‘Long text’, and the ‘Unique’ dropdown to ‘No’.

Now that we have created the custom fields, it is time to create the conversation that will cause the mail to be sent. Follow the steps below:
- Navigate to the Chatbot menu;
- Create a new conversation and fill in the question variations;
- Start the conversation with a ‘Text module’. In our example, we use this module to ask which product the customer is interested in;
- Next, select the 'Multiple Choice answers’ module. These multiple choice options will ensure that the email is sent to the right department/branch. In our example we will create three buttons. Button 1 is 'Furniture', button 2 is 'Flooring' and button 3 is 'Accessories'.
Time to actually have the custom field 'Department for lead mail' filled in. This works as follows: the first custom field that we have created must be filled in automatically to ensure that the mail goes to the right department.
We will do this by placing an action under the buttons we just created that ensures we know which department it concerns.
- All buttons must be filled in automatically. Select the first button;
- Click on the circle with the arrow that appears under the button. Note! You can only do this if there are no other modules under the button yet;
- Then select 'Fill in custom field automatically', a field will now appear under the button;
- From the dropdown menu, select the custom field ‘Department for lead mail';
- Repeat for all the other buttons.
This can also be done with all other 'Responses' modules.

Now that we know which department the mail should be sent to, it is of course important to ask for data in order to send it along with the mail. To make this as efficient as possible, we are going to create a new conversation for data retrieval. Follow the next steps:
- Create a new conversation called 'Questionnaire' and fill in a single character at the question variants, for example x in all fields;
- Start this conversation with a ‘Text module’. In this module you can ask for the data you want to know. For example "What is your first name?";
- Below the text module add a 'custom field’ module. The first name is already selected by default. Do you want to ask for other data? Click on the 'custom field’ module and select which field you want to fill in. The input the customer types in is automatically saved in the customer's profile by the chatbot;
- Repeat these steps until you have asked all the data you want, for example an email address, phone number and any question the customer has.

To make sure that the email with the data is actually sent, the custom field 'Send mail trigger' needs to be filled in as well. We will do this by asking the customer to confirm that the data is correct. Follow the steps below:
- Create a new conversation. This new conversation is there to offer customers the option to go through the previous conversation again when they indicate that the data is not correct;
- Once again, fill in the question variants with a single character, such as 'x';
- Add a ‘Text’ module to start this new conversation. For example, ‘Is the entered data correct?'
- Add a 'Multiple Choice Module' below that with two buttons: 'Yes' and 'No'.
- Under the 'Yes' button we can add another action. Click on the circle with the arrow that appears below it. Note! You can only do this if there are no modules under the button;
- Select 'Fill in custom field automatically'. A field will now appear below the button;
- Select the custom field 'Send mail trigger' from the dropdown menu;
- Place an ‘End of conversation’ module below or a ‘Link to conversation’ module if you want to send the customer back to the main menu;
- Under the 'No' button, add a ‘Text module’, for example, 'No problem, you can fill out the data again';
- Then add a 'Link to conversation module' to this and link to the ‘Questionnaire’ conversation;
- Go back to the 'Questionnaire' conversation. Add a 'Link to conversation module' here at the end. Link the conversation to the conversation we just created where we ask if the data is correct, this way you make sure the customer is following the correct flow.


We will also do this for our first conversation. This is because it still needs to be linked through to the ‘Questionnaire’ conversation.
- Select your first created conversation from this best practice article;
- Add a ‘Link to conversation’ module below the three buttons;
- Select the conversation 'Questionnaire'.
Now that everything is set up correctly in Watermelon, it is time to set everything up in Zapier so that the email is actually sent.
Setting up Zapier
Time to create the Zap. Follow the steps below:
- Open your Zapier account and click on 'Create zap';
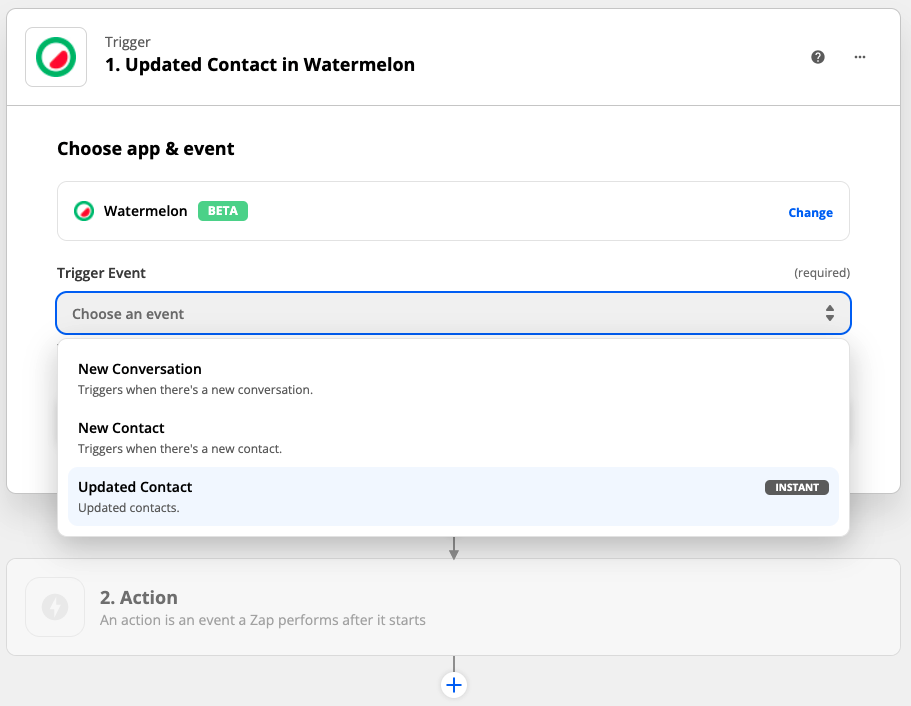
- Search for the app 'Watermelon' and select the app;
- Under 'Trigger event' select the option 'Updated contact';
- Next, select your Watermelon account. If you haven't set this up yet, read how that works here;
- Test the trigger and click on 'Continue'.
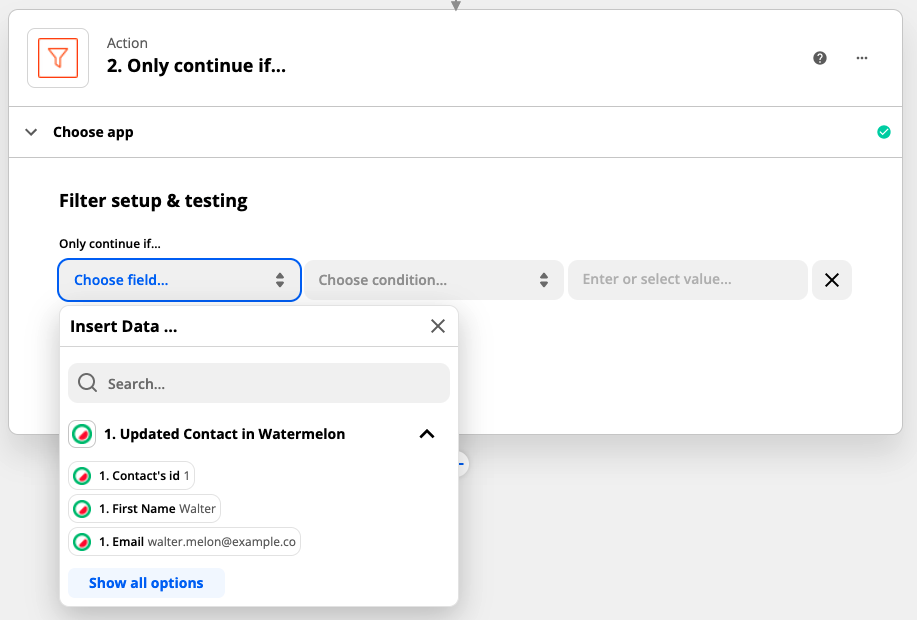
For the action we set up a filter. This is necessary to ensure that the Zap only works when the field 'Send mail trigger' is filled in. Of course you don't want the department to receive an empty mail. Follow the steps below:
- Click on ‘Filter’ (right side, second option);
- Under ‘Filter setup & testing’, select the 'Send mail trigger' custom field at ‘Choose field’. Don't see the field listed? Then you can search for it or click the 'Show all fields' button;
- Click on 'Choose conditions' and select the option 'Exists';
- Click 'Continue'. Now it will say that the zap would not have gone through. That's correct, because with the test contact, this field is still blank.
Time to add the Google Sheets spreadsheet with the mail addresses the email can be sent to later:
- Click on the blue plus (+) button to add the next action;
- Search for the app 'Google Sheets' and select it;
- At ‘Action event’ select 'Lookup Spreadsheet Row';
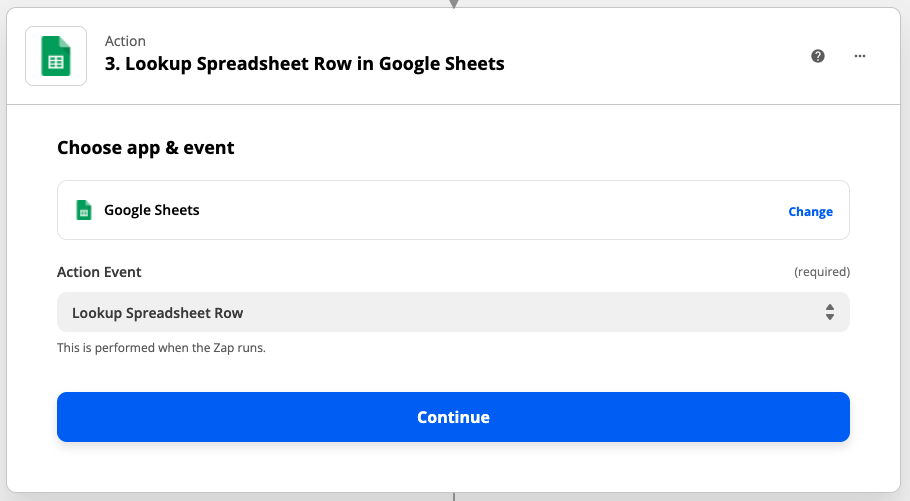
- Click continue and then select your Google Sheets account. Click on continue again;
- At 'Set up action' select your spreadsheet at 'Spreadsheet';
- At 'Worksheet' select the correct tab with the information. By default this is 'Sheet1';
- Now it is important that under 'Lookup column' you select the correct column in which the departments are listed. Attention! These are not yet the mail addresses. In our example this will be 'Furniture', 'Flooring' and 'Accessories';
- In the field below, 'Lookup Value', select the custom field 'Department for lead mail'. This is where the department to which the mail should be sent comes out;
- Then click on 'Continue' and on 'Test & continue'. After the test is completed successfully, we are going to add a new action in the Zap.
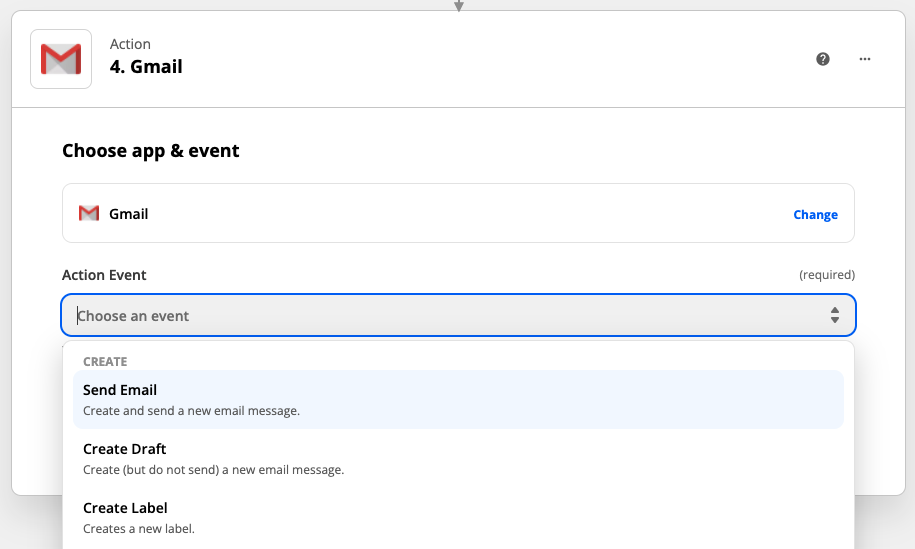
Now we are going to add the mail. For this it’s important that you know which mail provider you are using or the details of your mail server. In this example we are using Google Workspace as our mail provider. For the other options this step works the same, only the input of the data of your provider or server may differ. Follow the steps below;
- Click on the blue plus (+) to add the next action;
- Search for the app 'Gmail' and select it;
- At ‘Action event’ select 'Send mail';
- Click on continue and then log in with the mail account you want to send mail from. Click on continue again;
- At ‘Set up Action’ click on the 'To' field. Now a dropdown menu appears. In this dropdown menu, click on the Google Sheet you just added. From this menu, select the column where all the mail addresses have been entered. In our example we have named this column 'Email address';
- If you scroll down you will see the field 'From'. This is the mail address you just used to log in. Below this you fill in the 'From name'. This is what you will see when you receive the email. In our example we called this 'Chatbot lead';
- At 'Subject' fill in what the subject of the email should be. In our example, this is 'New chatbot lead! 🎉 ';
- For the 'Body type' field, you have two options. You can choose either 'plain' or 'html'. The 'html' option allows you to format the mail in a way that suits your business. This requires a template of a mail or knowledge of html to make this yourself. In this best practice we go for the option 'plain';
- In the field 'Body' you enter the data that the chatbot has asked for and that you want to give back in the mail to the right department. If you click on the field you'll see that an option appears at the bottom. This is where you can get data from;
- In this dropdown select Watermelon. Here you can add all custom fields that are filled in in the mail. You can also type text above it to make it clearer. For example, 'Name lead' with the custom field First Name below it;
- Then click on 'Continue' and on 'Test & continue'. After the test is completed successfully, you can turn on the zap and test it.
Congratulations! You have now successfully automated your lead stream and a new email with lead information is sent to the right department automatically.