This article describes how to automatically complement your contacts with contact information.
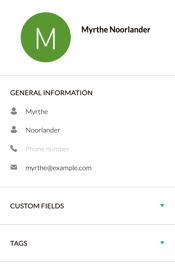
The chatbot is able to request contact information from a visitor. The chatbot then adds this information to the customer profile of the visitor. See the image on the right for an example of what this looks like. The chatbot can fill in different types of information.
This article uses adding a phone number as an example.
Step 1
Navigate to Chatbot via the menu and select Add knowledge. There, create a new conversation. It is also possible to use the steps below to modify existing conversations.

Step 2
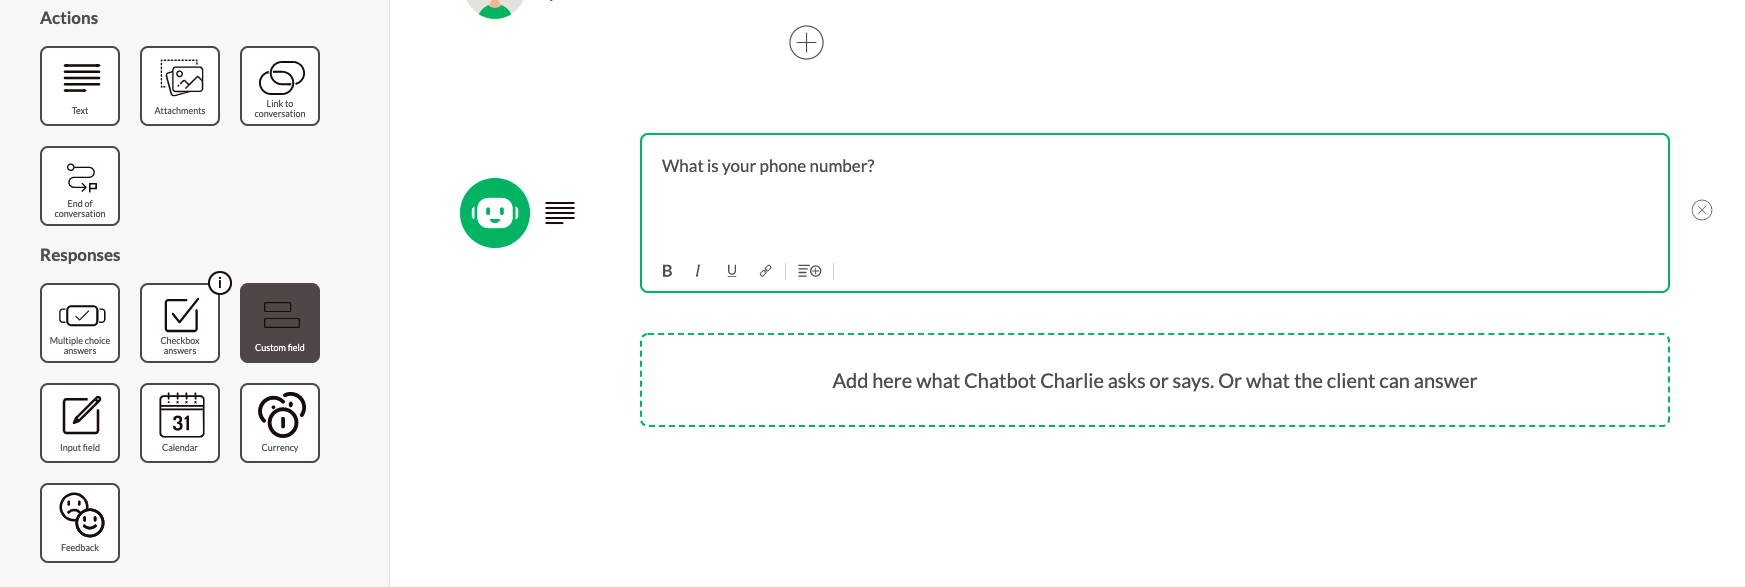
For each custom field, you should ask the visitor a question. For example "What is your phone number?" or "What is your customer number?". This way the visitor knows which data he or she has to fill in. If you do not do this, the visitor may fill in the wrong information in the custom field.
Step 3
Select the desired Custom field to be filled in. In this example it's phone number, but this can be any Custom field you like, also a Custom field you created.
If you want to change the chosen Custom field, click on the green arrow next to the chosen Custom field and select the desired Custom field. When the correct option has been chosen, click on Save. If you change a Custom field in the conversation you also have to change the question the chatbot questions, see step 2.
If you want to remove the Custom field from the conversation, click on the cross to the right of the Custom field.

Step 4
After saving, choose the desired follow-up step for the conversation and the automatic provision of contact information within your contacts is included in the conversation! Don't forget to save the conversation after finishing it.
Returning a custom field
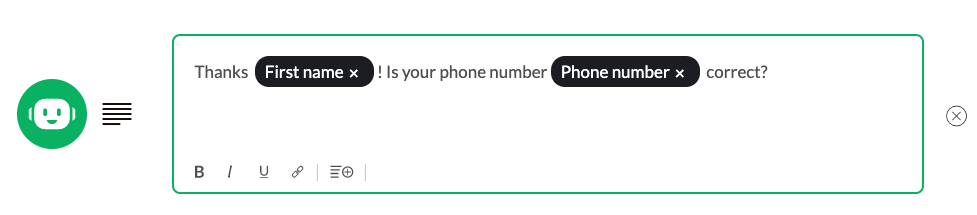
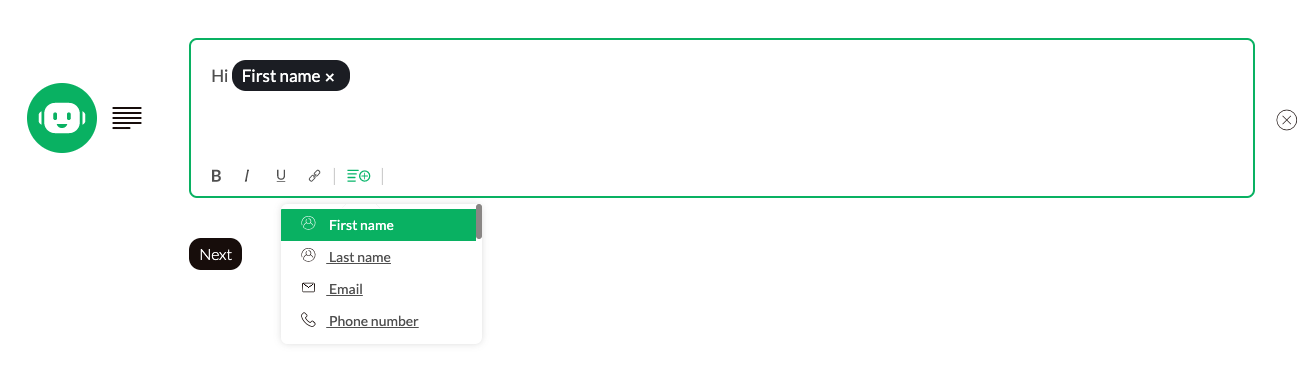
When the customer fills in a custom field, you can have the chatbot return it to the customer later. For example, if you ask someone's first name first, you can then have the chatbot respond with "Hi [first name]!" You can enter this into the chatbot's action in the text field via the icon with dashes and the plus.
Note: if the visitor has not yet left any information and thus this custom field has not yet been saved under the contact, the chatbot will not show any information and the text will continue as planned.
Multiple Custom fields in one text field
It is possible to add multiple custom fields in one text field. To do this you simply choose the place where you want the custom field and add it.
An example: